

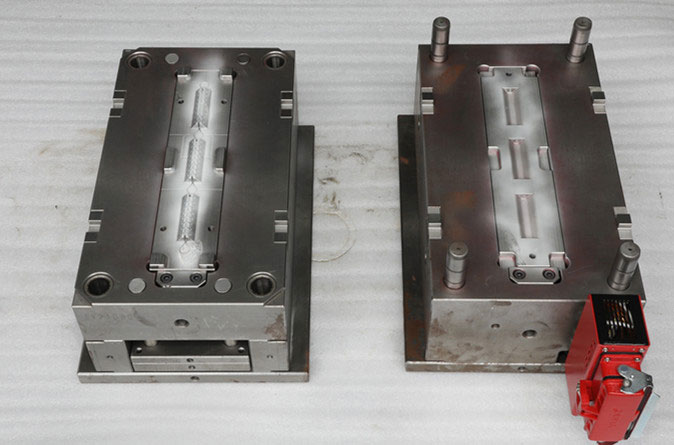
Plastic injection mold is a kind of tool for molding plastic products.
Usually, one complete plastic injection mold has two halves, one half is called mold cavity which is assembled on the fixed mold plate of the injection machine, another half is called mold core which is assembled on the removable plate of the injection machine.
Plastic injection molds can offer complete structure and precise dimensions for plastic products. Before we produce mass production of plastic products, we need to make the plastic injection mold first, the mold is the tool to shape the plastic products.
We put the plastic injection mold into a plastic injection machine, feed the plastic material into the hopper of the injection machine, plastic material will be heated to molten flowing liquid and running into the mold, after continuous heating, keeping pressure, molding, and cooling, the plastic products finished the molding process, then open the machine the plastic parts will be dropped out or taken out by hands. This is one kind of production method for plastic parts.

Sprue, runner, gate, slag well
Ejector pin, ejector block, ejector plate etc
Guide pin, guide bush, locating block etc
Mold heat dissipation, cooling circuit
Cavity, core, insert etc
Fitting gap of all inserts , fitting gap of ejector pins , extra venting slots.
Slide, angle pin etc

Here are eight tips on how to install a plastic injection mould properly.
Check out if the material entrance guide bushing and mold plate locating hole and the locating ring assembly positions are right.
Check whether the guide pin and guide sleeve-fitting position is correct, their movement should be smooth and free.
Fitting mold by low pressure and slow speed and examining each component are in the right working position.
After mold fitting, secure the mold with a press plate, press plate should be in even distribution, bolt tightening points should be reasonably distributed. When the nut is applied, the diagonal line should be tightened at the same time, and the tightening force should be gradually increased.
Slowly open the mold, adjust the ejector rod position, noted the ejector rod fixed plate and moving die bottom plate should leave a 5mm gap.
Calculate mold plate stroke, fixed stroke slider control switch, adjust the moving die stroke.
Test and calibrate the working position of the ejector rod, and adjust the limit switch of the clamping device.
Adjust clamping force, starting from small figures to when the elbow connecting rod movement is quite relaxed during mold fitting.

The surface of the core which includes block, guide pin, slide base, slide rail, etc should be cleaned and without rust, and should check the appearance without damage.

The surface of the cavity which includes a cavity, angle pin, angle slide, guide bush, etc should be cleaned without rust and should check the appearance without damage.

The guide pin is used to guide the fitting position of the mold core and cavity, before maintenance of the guide pin, the oil contamination must be thoroughly cleared which includes an oil ring, then spread the butter evenly around the guide pin with fingers.

(1) Angle pin and angle guide block must be cleaned and clear
(2) The angle of the angle pin mainly decides the stroke of the slide
(3) Angle guide block is used to position the slide when mold fitting

Clean the surface of the slide, spread the butter on the bottom and sides of the slide with fingers.
Notice not to spread too much butter.

Clean the surface of the slide base with a cloth, spread butter evenly on the surface of the slide base.
Be careful to clean up the oil groove of the slide base.

(1) Sliderail is the entrance and exit track for movement between slide and mould.
(2) The size and the height of the slide rail determine the degree of tightness for slide movement, also determine the fitness of the slide is in place or not.


Below are four tips for the maintenance of plastic injection moulds, wish they will be helpful to you.
Give each mold a record card with detailed records of its uses and damages, which can be found which components are damaged, the damaged degree and size, to find and solve the problem of information data, and the mold forming process parameters, the materials used for the product, so as to shorten the debugging time of mold testing and improve production efficiency.
Test the mold function under the normal operation of the injection machine and the mold, measure the molding parts dimension, with this information we can finalize the mold current condition, find out the damage place of the mold cavity, core, cooling system, and the parting line. Judge the mold damaged condition and the repair measures according to the plastic parts.
Focused track and test the most important components of the mold. Ejection, guide components are used to secure the mold open and close movement and the ejection of the plastic part, if any of the components are damaged to get stuck, it will cause production to stop. So we must check if the ejection bar and guide pin are deformed or damaged, once they are founded we must replace them at once.
We should spread antirusting oil to the moving and guiding parts after finishing the production, especially pay attention to the protection of the bearing parts of which mold contains gear and rack, and the spring strength of the spring mold, to make sure they all always in the best working condition. Besides, the clean-up to the cold runner is very important to production efficiency and the quality of the product. As the production time continues, the cold runner will deposit burr, rust, mud, which will diminish the cold runner cross-section and narrow the cooling channel, greatly decrease the heat exchange rate between coolant and mold, increase production cost, so we must pay attention to the clean of the runners. For hot runner mold, heating and control system maintenance is very important and can prevent problems. We must test the heaters, heater probe, and thermocouple by using ohm gauge after each production finishing, should replace if they are damaged, and compare with the mold record card and make records for future checking and resolve the problem.
After injection molding products, there will often be size fluctuations. In order to solve this problem, we need to start from the source and manage the production and manufacturing process of the mold:
Different raw materials have corresponding temperature requirements, if the fluidity of plastic material is poor, then the temperature should be increased to control it in the best flow value range.
Different injection products have different geometric shapes, sizes,s and wall thickness ratios, have different requirements for the cooling system, and mold temperature controls the cooling time of the products to a great extent, so when the mold temperature changes, shrinkage rate also can make a big change. When the mold temperature is stable, the size of the injection products is more accurate. There will be no deformation, poor luster, cooling spots, and other defects. Therefore, relevant personnel should try to keep the mold in an allowable low-temperature state, which can not only shorten the injection cycle but also improve the efficiency of production management, so that the physical properties of raw materials are in the best state. In addition, in the production and manufacturing process of injection molding products, the set value of the mold temperature should be within the recommended temperature range of raw materials, and can not be arbitrarily changed.
When testing the mold, appropriate clamping force and injection pressure should be determined to ensure that the air in the mold cavity, core, and the gas generated by the plastic can be discharged from the mold through the exhaust groove. It should be noted that if the exhaust is not smooth, there will be insufficient injection, which will cause weld marks or burns. The molding defects sometimes appear in the same part, when the injection product is relatively thin, and the mold temperature is relatively high, the product is easy to be burned, and the burned part will appear welding marks at the same time, this is the consequence of not paying attention to the exhaust groove. In order to avoid burns, the depth of the exhaust shoulder should be designed deeper, and a large ventilation groove should be opened at the back of the shoulder so that the gas behind the shoulder can be discharged quickly out of the mold. If there is a special need, an exhausted groove should be opened on the ejector rod to ensure that there is no flash.
After demolding, injection products will change with the temperature, different degrees of deformation, and warping, at this time can use some auxiliary fixture adjustment, take remedial measures timely, when the product is cooling after solidification, which can achieve good adjustment effect.
In the whole injection molding process for strict management, injection molding product size will be the very ideal control, to avoid large fluctuations in size.


Possible Reasons
1. The screw nozzle is blocked or injection volume is not enough.
2. Molding pressure/temperature/backpressure time is not enough, injection speed is too fast or too low.
3. Gate system design is not reasonable, gate is not parallel or is too small or not in the proper location.
4. Mold venting structure is not good. In molding production, material flows into the mold cavity meanwhile the air goes
into somewhere and can't exhaust.
5. Material is not dry enough.
Improved Methods
1. Dredge the screw nozzle or change a bigger clamping force machine.
2. Increase injection pressure/temperature/backpressure time, increase or decrease injection speed.
3. Optimize gate system, enlarge mold gate or add more gates, relocate gate position.
4. Add mold exhaust or optimize venting structure.
5. Drying the material.
Possible Reasons
1. Clamping force is not enough, high pressure plastic makes parting line or insert fitting surface a gap, the melt plastic spills into the gap.
2. Mold cavity is not fixed very well to the nozzle makes the cavity and core leave gap.
3. Mold and material temperature and pressure is too high, injection speed is too fast.
4. Back pressure is too big, injection time and back pressure time is too long, injection pressure is not even.
5. Mold guide pin and guide bush wears/mold assembly plate broken/ejector rod bent, parting line moves.
6. Melt material with good fluidity,PP/PA/PS etc.
Improved Methods
1. Using a bigger tonnage injection machine.
2. Check and fix well of the cavity.
3. Decrease mold and material temperature and pressure, lower the injection speed.
4. Decrease back pressure, shorten injection time and back pressure time, make injection pressure even.
5. Replace new guide pin/guide bush/assembly plate/ejector rod.
6. If above measures are not workable, then try to change another plastic material if possible or trim the flash by hands.
Possible Reasons
1.Material shrinkage is too big, didn't add setting agent.
2.Material poor fluidity, too little lubricant, filling agent is not enough.
3.Injection pressure too low, injection speed is too slow.
4.Injection time and back pressure time is too short.
5.Material temperature and mold temperature is too high.
6.Wall thickness is too thick, especially ejector pin location is too thick.
Improved Methods
1. Add some setting agent to the plastic material.
2.Add lubricant or filling agent to the plastic material.
3.Increase injection pressure and injection speed.
4.Increase injection time and back pressure time.
5.Lower material temperature and mold temperature, extend cooling time.
6.Make the wall thickness thinner or more even.
Possible Reasons
1. Plastic material particle size is different, this cause Plasticizing inequality, or there is unmelten granules arround the mold gate.
2. Plastic material mixed with other different material.
3. hopper temperature and material temperature is too low.
4. Screw rotatation speed is too fast and the cycle time is too short.
5. Back pressure is too low.
Improved Methods
1. Use formal branded material.
2. Check out material, if it's mixed with other material, need change new material.
3. Increase temperature of hopper and material.
4. Decrease screw speed and enlarge cycle time.
5. Increase back pressure.
Possible Reasons
1.Product design and mold design is not proper.
2.Injection pressure too high, the molecular orientation of the fluid direction and the vertical direction differ greatly, and the plastic tries to restore the original crimping state, so the contraction of the fluid flow direction is greater than the contraction of the vertical flow direction
3.Melten material temperature is too high, back pressure is too high which cause the inner pressure of the material is too high, after demoulding, the release of internal stress causes the plastic parts to warpage.
4.The melt flow rate is too slow, the tempering temperature is too high or the time is too long.
5. Material property, PP/PA material itself deform easily.
Improved Methods
1. Use formal branded material.
2. Check out material, if it's mixed with other material, need change new material.
3. Increase temperature of hopper and material.
4. Decrease screw speed and enlarge cycle time.
5. Increase back pressure.
Possible Reasons
1. Material hydroscopicity is big, material decomposition and embrittlement which leads crack. Or add too much recycle material, fiber glass or fillers. Use easy cracking coatings and thinners.
2. Injection speed too high, back pressure time is too long, screw speed is too fast. Mold temperature and injection pressure is too low.
3. Internal stress is not eliminated which cause crack.
4. Mold venting is not good, the air comes into the mold in plasticizing stage.
5. Mold opening speed too fast, opening pressure is too big, which cause forced demolding parts crack.
Improved Methods
1. Dry material, use some release agent, clean up the mold surface. Avoid the use of easy cracking coatings and thinners. Decrease the percentage of recycle material, fiber glass or fillers.
2. Lower injection speed, shorten back pressure time, decrease injection pressure and screw rotation speed. Increase mold temperature and injection pressure.
3. Annealing treatment immediately after molding to eliminate internal stress and reduce the crack.
4. Add more ventings on the mold, avoid air enters.
5. Adjust mold opening speed and pressure, to avoid the parts crack when forced demolding.
Possible Reasons
1. Mold or plastic raw material have water or vaparized water. Raw material decomposed under high temperature. Release agent generates some vilatile gas.
2. Mold cooling circuit seepage. Gate and cavity layout is uneven.
3. Mold temperature is too low,melten material temperature is too high and melting time is too long. Back pressure time is too long, injection speed is too fast.
4. Wall thickness is uneven.
Improved Methods
1. Increase drying time of plastic material. Storage the plastic material in clean, dry and ventilated place. Use less release agent or which doesn't contain vilatile matter.
2. Check out and improve mold cooling circuit. Optimize and make gate and cavity even.
3. Decrease melten material temperature and shorten the melting time. Increase back pressure, decrease back pressure time, lower injection speed.
4. Optimize product design to make wall thickness even.
Possible Reasons
1.Injection nozzle is too small or blocked.
2.Mold design effect, gate location not reasonable, gate too small, gate layout is not symetric, runner too slim, mold cooling system not reasonable block the air venting.
3. Mold parting line lack of essencial air venting or venting blocked, mold surface rough, high friction resistance cause local hot spots which resolve the material.
4.Material temperature is too high, injection pressure too small and back pressure time too short.
5. Injection speed too fast creates decomposed gas.
Improved Methods
1. Clean up the injection nozzle.
2. Optimize mold design, relocate gate location, enlarge gate, make gate symetric, broaden runner, optimize mold cooling system.
3. Add mold venting, smooth mold surface.
4. Lower material temperature, increase injection pressure and increase back pressure time.
5. Lower injection speed.
Possible Reasons
1. Product design is unreasonable, wall thickness is too thin.
2. Mold design defect, gating system is not proper, runner too narrow, sprue too long, gate is too small, ejection type, location, layout and size is not proper, cooling circuit and venting is not good.
3. Injection pressure too high, melten material temperature too high but mold temperature too low, cooling time too short, back pressure is too high and back pressure time too long.
Improved Methods
1. Dry material, use less vilatile substance and less lubricant.
2. Adjust lower injection speed, material temperature, injection pressure and screw rotation speed.
3. Lower barrel temperature.
4. Clean up the nozzle, screw, check valve and mold.
5. Add more ventings on the mold.
 English
